***
description: Overview of NOM 151 signature type.
'og:description': Overview of NOM 151 signature type.
-----------------------------------------------------
# NOM 151 Overview
## What is NOM 151?
NOM 151, or Normativa 151, is a Mexican standard that guarantees the integrity of electronic documents. It provides a data retention certificate that verifies the document hasn't been altered after signing, confirming its integrity and reliability for any transaction.
## How does NOM 151 work?
Dropbox Sign integrates with eID Easy, a partner of Edicom, to support NOM 151 compliance for both Dropbox Sign web and API users in Mexico. This integration creates a secondary certificate, separate from the original signed document, that verifies its integrity according to NOM 151 regulations.
With the NOM 151 certificate enabled, signature requests will have this secondary certificate added to the request, which can be accessed through your Dropbox Sign account once the request is completed.
## How can I add NOM 151 to my workflows?
Dropbox Sign users on a Premium plan can enable this feature through their Admin Console settings. Admins can navigate to their "Signature request options" settings to enable the NOM 151 certificate feature for their signature requests. Once enabled, the option to add a NOM 151 certificate will appear as an additional checkbox under the Signature Type options in the Dropbox Sign web workflow. Additionally, API users will be able to include the nom\_151:true option in the certification\_types parameter.
## Setup
Note: You must have a Dropbox Sign Premium plan to use NOM 151. Please see out our Dropbox Sign Pricing and our API Plans and Pricing page for more information.
| Steps | Images |
| ----------------------------------------------------------------------------------------------------------------------------------------------------------------------------------------------------------------- | ------------------------------------------------------------------------------------------------------------------------------------------------ |
| 1. Open the Admin Console from the user menu in the Dropbox Sign web page. | 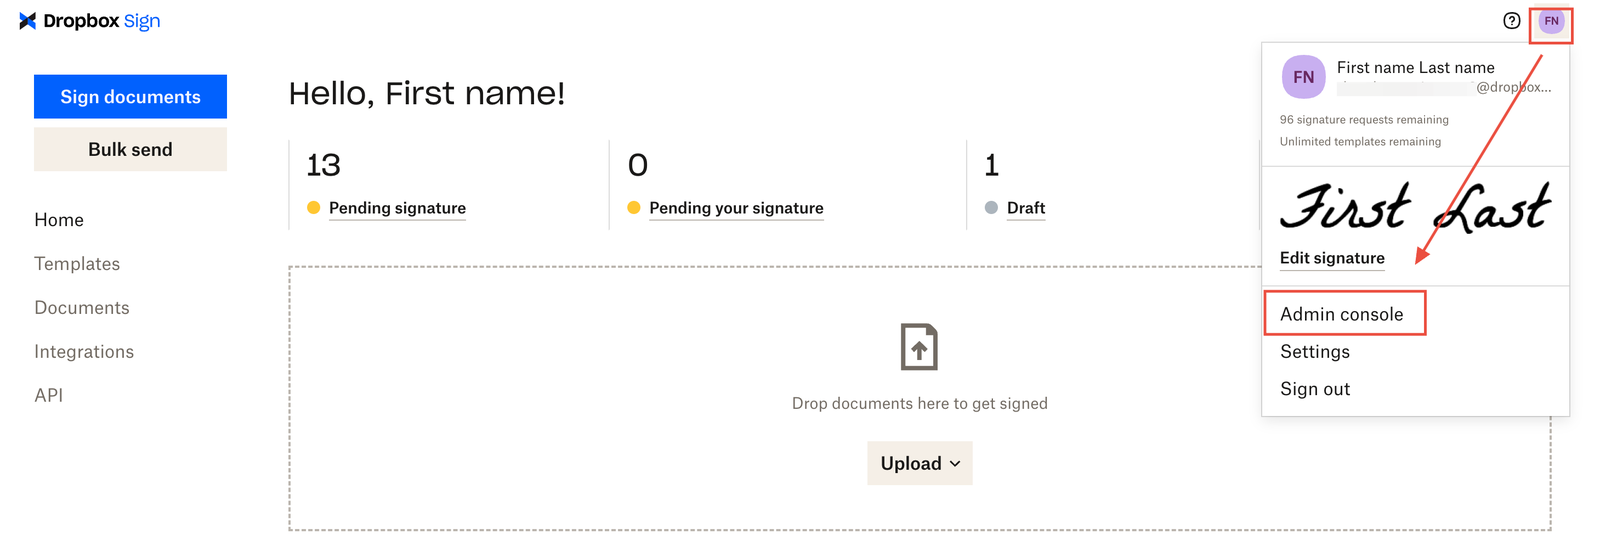 |
| 2. In the
|
| 2. In the Admin Console, select "Settings" and then "Signature requests". Scroll to the "Signature request options" subsection and navigate to the NOM 151 entry. | 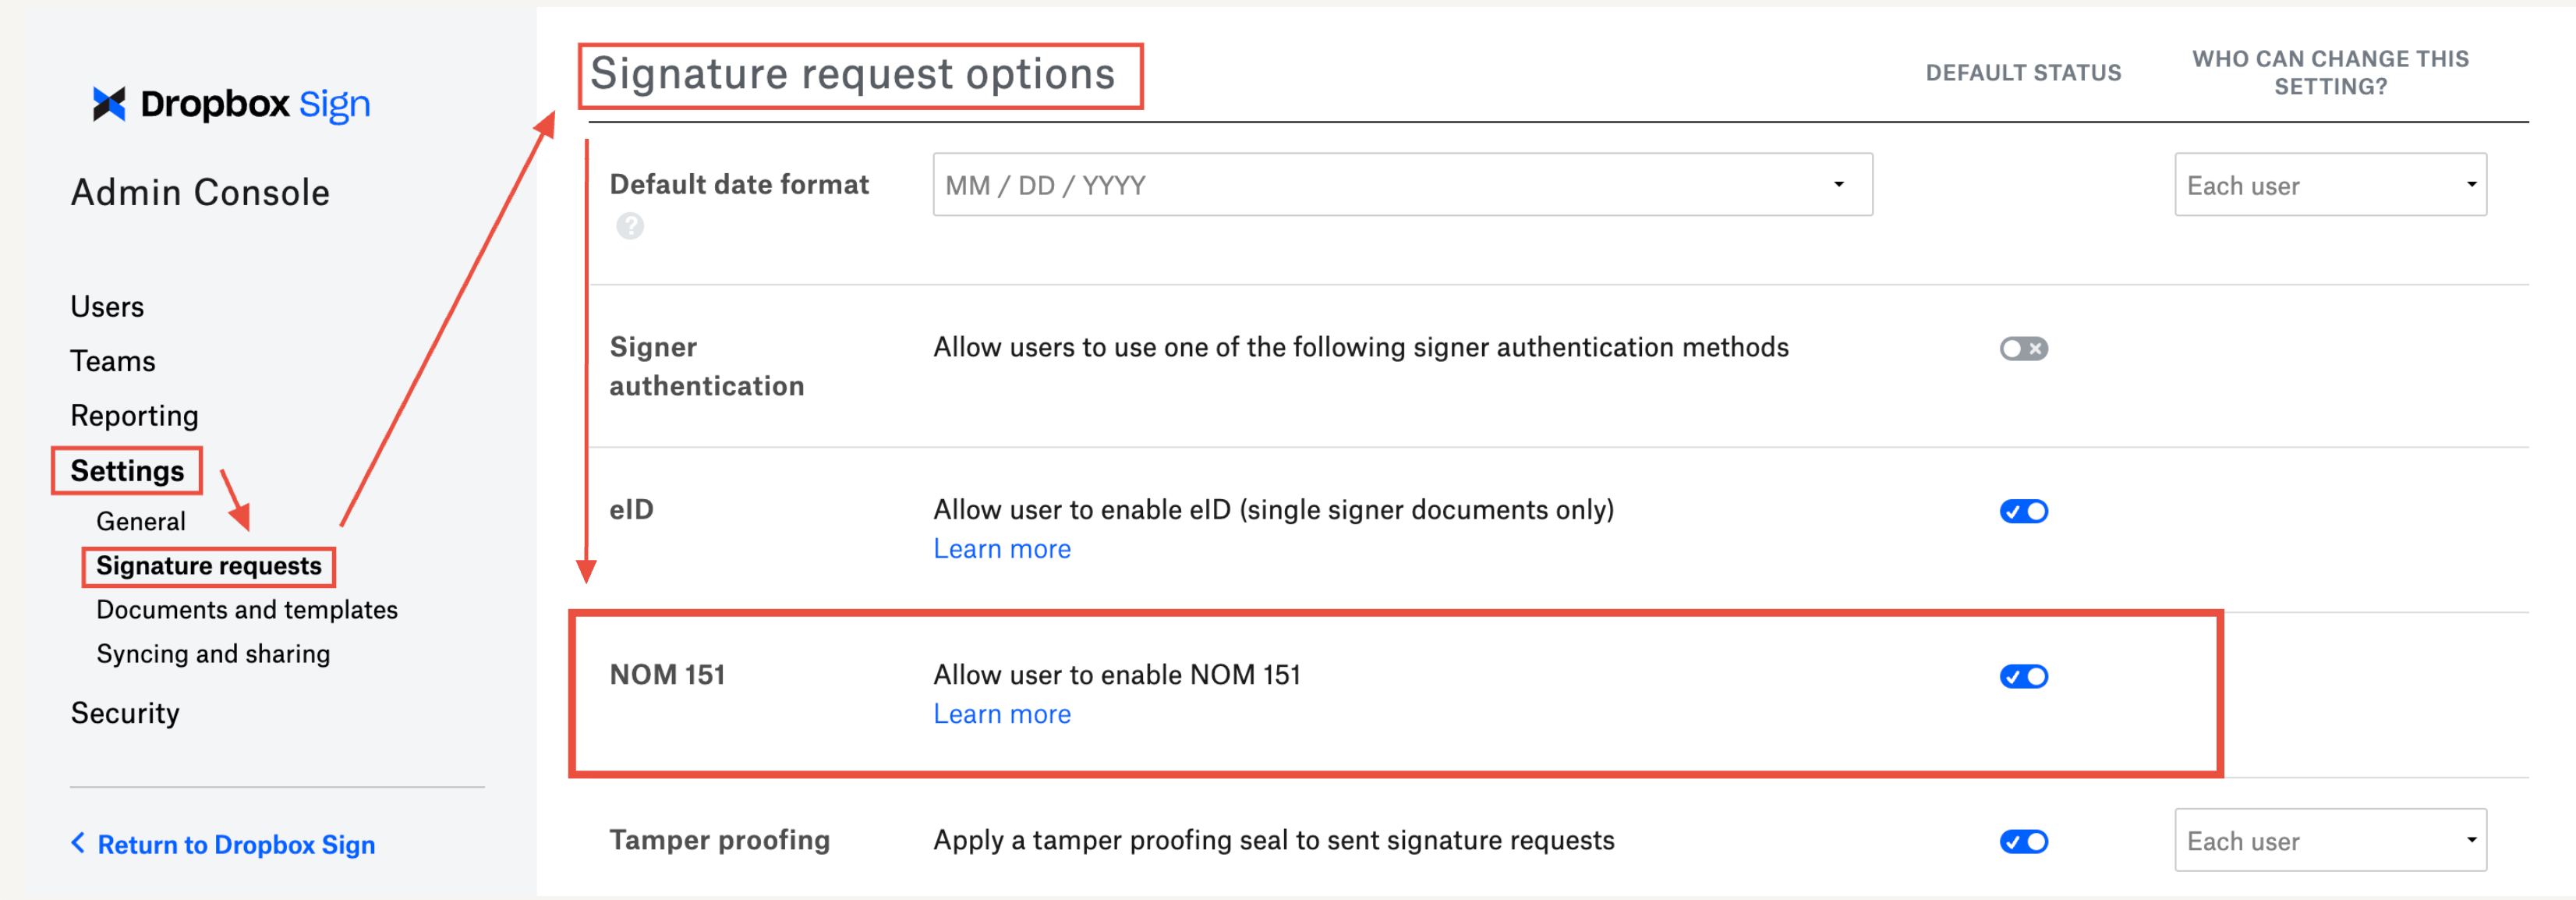 |
| 3. Activate NOM 151 by selecting the switch control. |
|
| 3. Activate NOM 151 by selecting the switch control. |  |
| 4. Select the "Save settings" button. If activation is successful, you'll see a green banner with a confirmation appear at the top of the screen. |
|
| 4. Select the "Save settings" button. If activation is successful, you'll see a green banner with a confirmation appear at the top of the screen. | 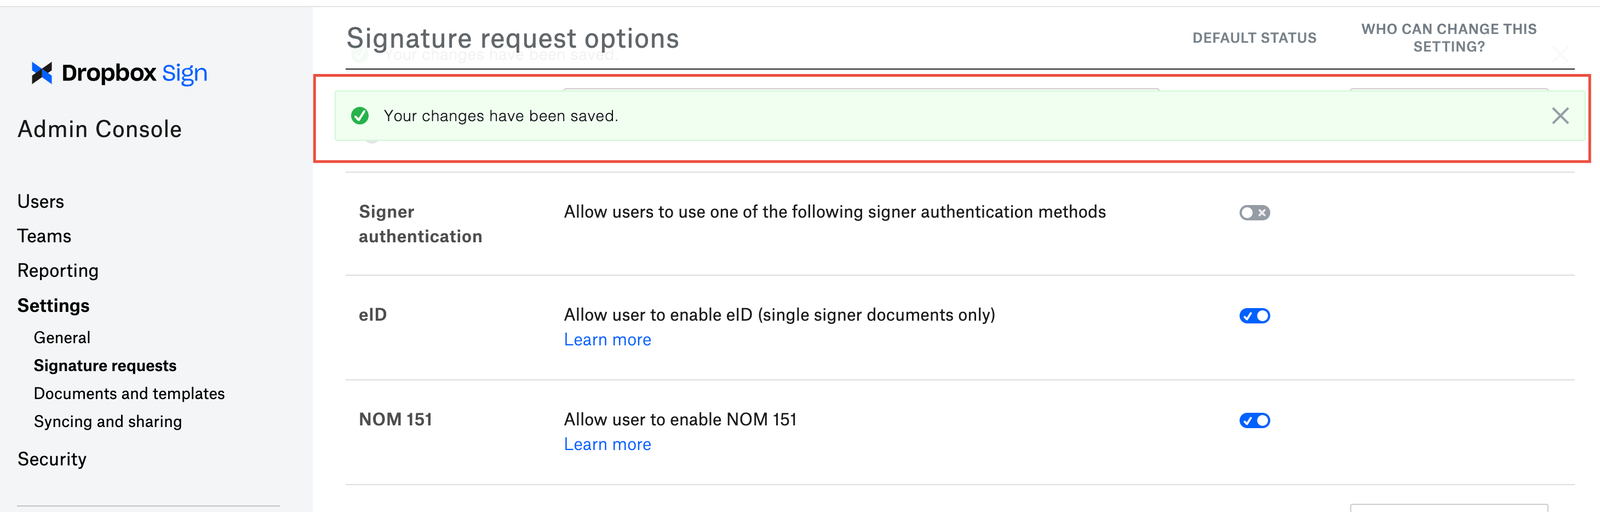 |
|